Home Managed AVD
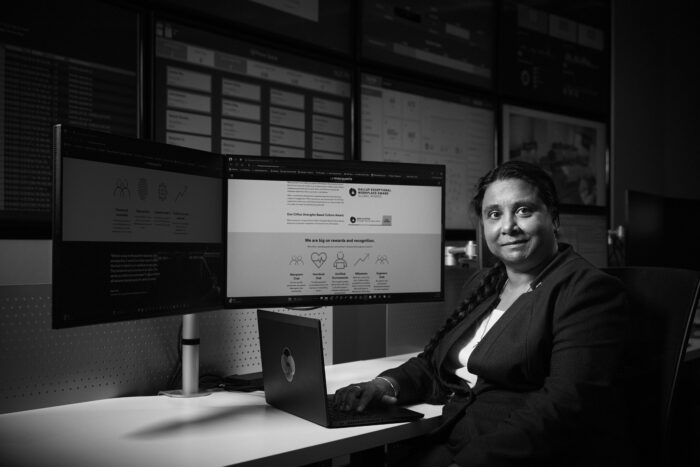
Managed Azure Virtual Desktop for Government.
Secure, scalable desktop environments designed for control over identity, data and access. Backed by deep Microsoft alignment and local expertise, our managed Azure Virtual Desktop service is built for regulated environments.
Managed Azure Virtual Desktop
Designed for flexibility.
Workforces are under pressure to enable flexibility, but security, compliance and performance requirements remain constant. Azure Virtual Desktop enables secure, centralised access to applications and data, without putting your environment at risk.
- Deliver consistent desktops to any device.
- Simplify provisioning and ongoing management.
- Secure access to corporate data and apps.
- Align performance and cost to real usage.
Value you see
Secure access without compromised control.
Azure Virtual Desktop architected and operated with a focus on governance, compliance alignment, and cost optimisation to reduce operational and financial risk.
Unified experience
Provide users with the desktops and applications they already know, including Microsoft 365, with fast file access and seamless access from approved devices.
Security built in
Secure sign-on and multi-factor authentication protect access, with role-based controls to manage sensitive data and enforce governance policies.
Cost performance
Leverage eligible Microsoft 365 or Windows licensing and multi-session capabilities to align compute costs with actual user demand.
Support for modern work
Provide a consistent user experience across qualified devices, enabling secure work from the office, home or on the move.
Centralised control
Provision desktops, assign access and manage environments through Azure, reducing operational overhead and complexity.
Continuous refinement
From image lifecycle management to monitoring and remediation, your Azure Virtual Desktop environment is continuously optimised to maintain performance, cost control and compliance.
Use cases
How government agencies use Azure Virtual Desktop.
Proven ways to strengthen security, control, and modernise end-user computing.
Controlled data and application access
Centralise desktops and applications in Azure to keep sensitive data within your governed environments, rather than on local devices.
Secure hybrid workforce
Enable your team to securely access corporate desktops and applications from anywhere with an internet connection, and with access controls in place.
Responding to workplace changes
Support office relocations, organisational changes or workforce shifts by provisioning virtual desktops quickly, without rearchitecting existing infrastructure.
Simplified operations management
Move from managing individual devices to managing users, policies and performance within your centralised Azure environment.
Why Macquarie Government
Run Azure Virtual Desktop with assurance.
Designed with Essential Eight considerations from the start, and governed through active Azure cost management, your environment remains secure, predictable and aligned to policy. As workforce needs, compliance obligations and usage patterns evolve, your Azure Virtual Desktop environment scales in a controlled and structured way.
Built-in security
Azure Virtual Desktop designed and operated with identity-first controls and Essential Eight considerations embedded from day one.
Predictable costs
Active governance across Azure consumption, VM sizing and autoscaling to maintain visibility and control over per-user costs.
End-to-end delivery
Expertise across Azure, end-user computing, networking and security to support design, migration and ongoing operations.
Low-risk delivery
Phased delivery approach that reduces disruption and supports stakeholder confidence.
Ongoing optimisation
Continuous lifecycle, image and platform management to keep your environment stable, supported and aligned to evolving requirements.
Sovereign delivery
Services delivered by Australian-based engineers, with strong customer satisfaction reflected in a live NPS of +80.
Contact us
Talk to an AVD expert.
We’re here to guide you through your next steps.
- 1800 004 943
- Level 15, 2 Market Street Sydney, NSW, Australia
Managed AVD FAQs.
What is Azure Virtual Desktop?
Azure Virtual Desktop is a cloud-based service from Microsoft Azure that empowers organisations to build and oversee virtual desktops and applications in the cloud. Virtual desktops like Azure are accessible from different devices even without an internet connection, allowing collaboration and flexibility among remote users. Additionally, organisations seeking our cloud hosting services at Macquarie Cloud Services can utilise Azure Virtual Desktop to enhance their cloud infrastructure and access a range of Azure products.
What are the benefits of Azure Virtual Desktop?
- Flexibility – Users can access their virtual desktops and applications from different devices and offline, promoting remote work and flexibility.
- Cost savings – Moving to a cloud-based solution can reduce hardware and maintenance costs. If the team is fully-remote, it eliminates the need to spend on office space for IT infrastructure.
- Scalability – Azure Virtual Desktop allows you to tweak your computing resources based on how your team or business is doing. As your user count increases, you can ramp up the computing power to ensure things run smoothly and respond quickly. On the flip side, you can dial down the resources during quieter times to save on costs. It’s like tailoring your setup to match the ebb and flow of your needs.
- Security – Virtual desktops come with robust built-in security features. These include multi-factor authentication and data encryption, effectively preventing unauthorised access and ensuring confidentiality of sensitive information.
- Compatibility – Azure Virtual Desktop provides support for Windows-based applications and legacy software. Whether your team uses modern productivity tools such as Microsoft Office Suite or legacy software like Vista applications that are no longer compatible with newer operating systems, you can still provide user access through Azure Virtual Desktop.
- Centralised management – Administrators can manage and configure resources from a centralised dashboard. Instead of interacting with multiple interfaces or systems, desktop managers can accomplish various tasks from one convenient location.
How do I connect to Azure Virtual Desktop?
To connect to an Azure virtual desktop, you will need to follow these steps:
- Install the Windows Virtual Desktop client – The first step to connecting to an Azure virtual desktop is to install the Windows Virtual Desktop client on the device that you want to use to access it. You can download the client from the Microsoft website.
- Launch the client – Once you have installed the client, launch it by clicking on the desktop shortcut or searching for it in the Start menu.
- Enter your credentials – When the client launches, you will be prompted to enter your credentials. Use the username and password that you set up when you created your Azure virtual desktop.
- Select the virtual desktop – After you have entered your credentials, you will see a list of available virtual desktops. Select the one that you want to connect to and click the “Connect” button.
- Connect to the virtual desktop – The client will now establish a connection to the virtual desktop, and you should see a login screen. Enter your login credentials and click “Log in” to access the virtual desktop.
How much does Azure Virtual Desktop cost?
The cost of Azure Virtual Desktop depends on a number of factors, including the size and configuration of the virtual machine, the number of users, and the features and services that you choose to use. In general, the cost of an Azure Virtual Desktop is based on the resources that you consume, such as the number of virtual CPUs, the amount of memory, and the amount of storage. You will also need to pay for the Windows operating system, either through a per-user or per-device license, depending on your needs. There are also additional costs for features and services such as load balancing, auto-scaling, and application publishing. These costs can vary depending on your specific requirements.
Is Azure Virtual Desktop suitable for small businesses?
Absolutely! Azure Virtual Desktop can be suitable for small businesses, especially if they require remote access to applications and data. It provides the same benefits of flexibility, scalability and security whether you are a small organisation with fewer than 200 employees or a large enterprise with multinational operations and at least 2,000 employees. Smaller businesses can benefit from the per-device model, which licenses based on the number of devices that will access Azure Virtual Desktop and not the number of users. Though it offers less flexibility than the per-user model, the per-device licensing is more cost-effective and easier to manage for smaller organisations.
How does Azure Virtual Desktop work?
Azure Virtual Desktop is a software-as-a-service (SaaS) solution that allows you to provide your employees with access to their applications and data from anywhere, on any device. Your people can stay productive wherever they are, by gaining access to their familiar desktop and productivity tools. You can also keep all your users’ applications and tools up to date as they are accessed centrally, via the cloud. Azure Virtual Desktop uses Microsoft’s Azure infrastructure, which means that it offers scalability and flexibility. Also, security features like single sign-on and multi-factor authentication are standard. Azure Virtual Desktop also makes it easy to assign access to users based on their role, meaning it’s easy to restrict sensitive customer information and ensure everyone has the files they need.
How do I access Azure Virtual Desktop?
To connect to an Azure virtual desktop, you will need to follow these steps:
- Install the Windows Virtual Desktop client – The first step to connecting to an Azure virtual desktop is to install the Windows Virtual Desktop client on the device that you want to use to access it. You can download the client from the Microsoft website.
- Launch the client – Once you have installed the client, launch it by clicking on the desktop shortcut or searching for it in the Start menu.
- Enter your credentials – When the client launches, you will be prompted to enter your credentials. Use the username and password that you set up when you created your Azure virtual desktop.
- Select the virtual desktop – After you have entered your credentials, you will see a list of available virtual desktops. Select the one that you want to connect to and click the “Connect” button.
- Connect to the virtual desktop – The client will now establish a connection to the virtual desktop, and you should see a login screen. Enter your login credentials and click “Log in” to access the virtual desktop.
How to set up Azure Virtual Desktop?
To set up an Azure Virtual Desktop, you will need to follow these steps:
- Sign up for an Azure account – If you don’t already have an Azure account, you will need to sign up for one. You can do this by visiting the Azure website and following the instructions to create a new account.
- Create a virtual machine – To create a virtual desktop, you will first need to create a virtual machine in Azure. You can do this by going to the Azure portal and clicking the “Create a resource” button. From there, search for “Windows Virtual Desktop” and select it. Follow the prompts to create a new virtual machine, including selecting the operating system, size, and location.
- Set up the virtual machine – Once the virtual machine has been created, you will need to set it up by installing any necessary software and configuring the operating system. You can do this by using Remote Desktop Protocol (RDP) to connect to the virtual machine and install the software you need.
- Create a host pool – A host pool is a group of virtual machines that are used to host one or more virtual desktops. To create a host pool, go to the Azure portal and click on the “Windows Virtual Desktop” resource. From there, click on the “Host pools” tab and then click the “Add” button. Follow the prompts to create a new host pool, including selecting the virtual machine(s) that you want to include in the pool.
- Create a user assignment – A user assignment is a mapping between a user and a virtual desktop. To create a user assignment, go to the Azure portal and click on the “Windows Virtual Desktop” resource. From there, click on the “User assignments” tab and then click the “Add” button. Follow the prompts to create a new user assignment, including selecting the host pool that you want to use and the user(s) who will have access to the virtual desktop.
- Install the client – To use the virtual desktop, you will need to install the Windows Virtual Desktop client on the device that you want to use to access it. You can download the client from the Microsoft website.
- Connect to the virtual desktop – Once you have installed the client, you can use it to connect to your virtual desktop by entering the necessary credentials and selecting the virtual desktop that you want to access.
How do I use Azure Virtual Desktop?
Azure Virtual Desktop provides an easy-to-use virtual desktop experience that can be accessed from anywhere, on any device. It integrates with Azure Active Directory and Microsoft Intune to make it easy to deploy, manage and secure access to applications and data.
IT teams are using Azure Virtual Desktop to provide employees with a consistent experience across devices, reduce the need for expensive hardware investments, and give employees access from anywhere.
It also allows IT teams to create a virtual desktop environment for their users. This allows IT teams to create an environment where users can access applications and resources as if they were accessing them on a physical computer.